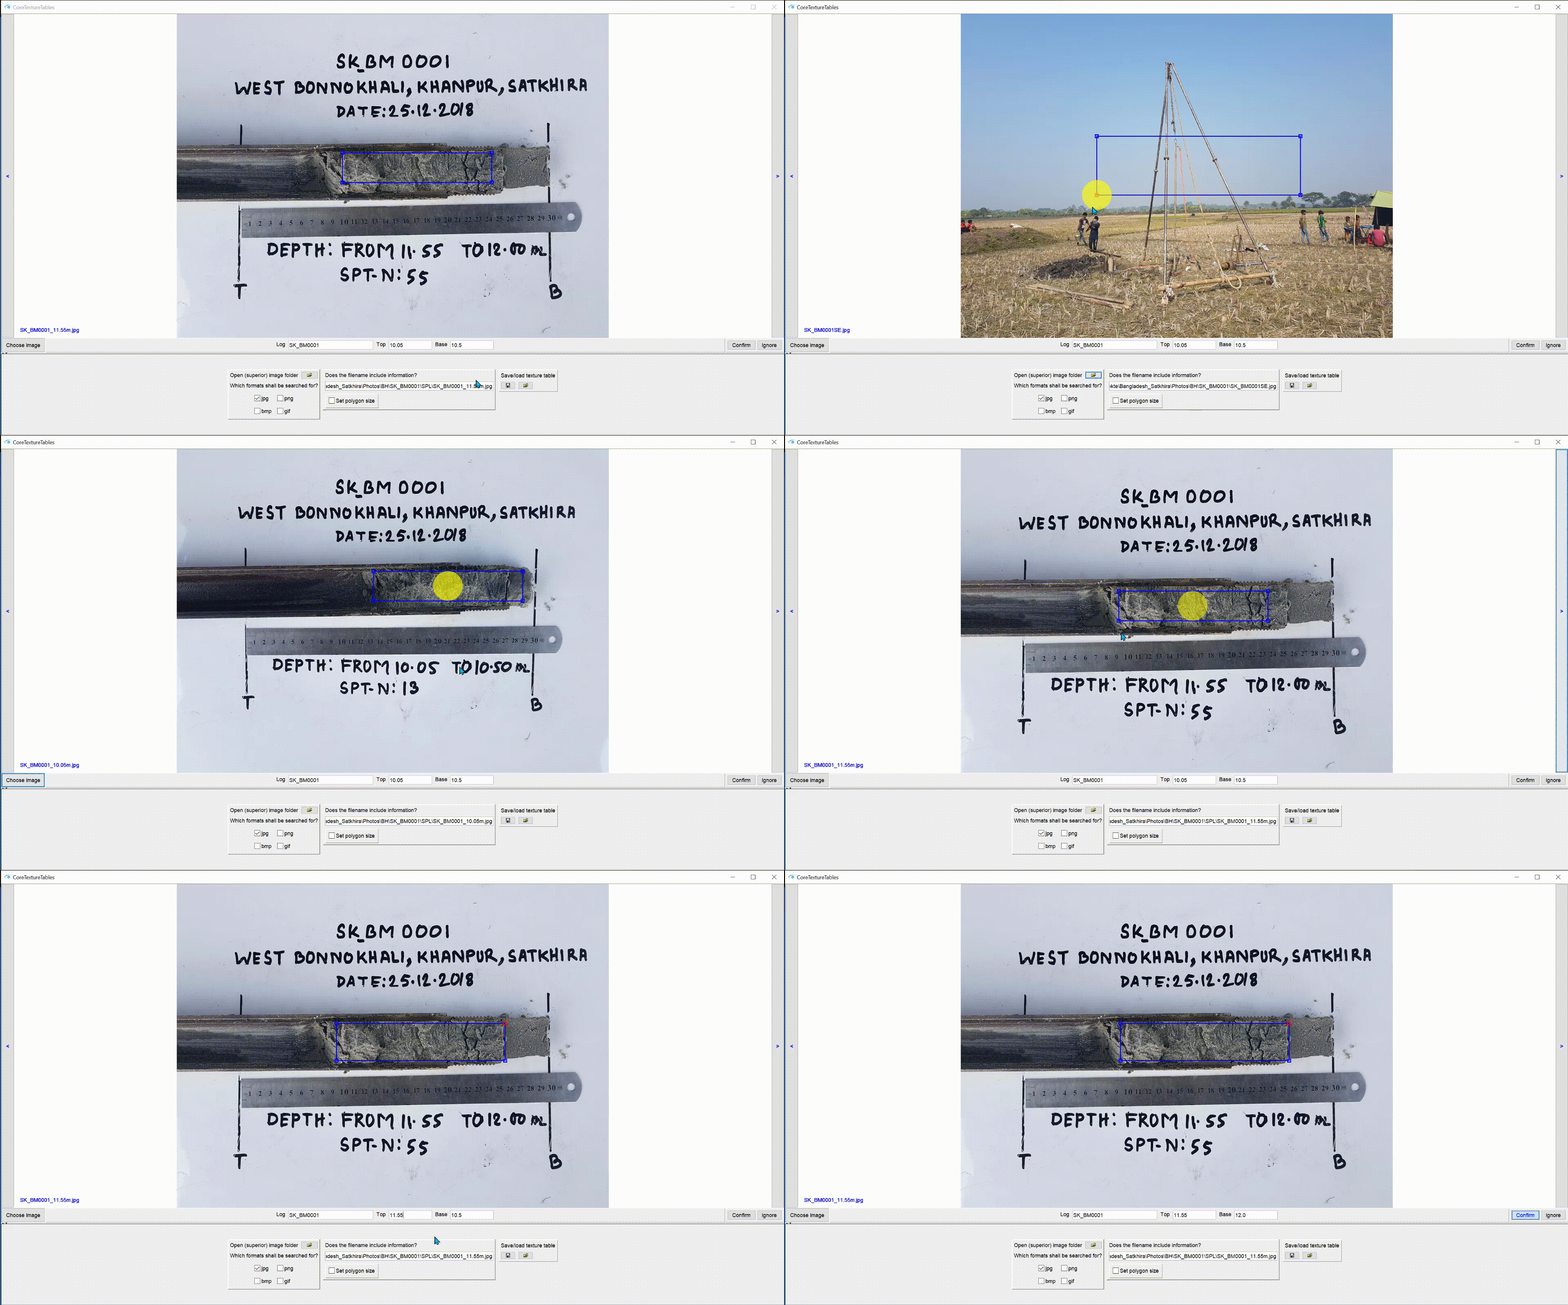
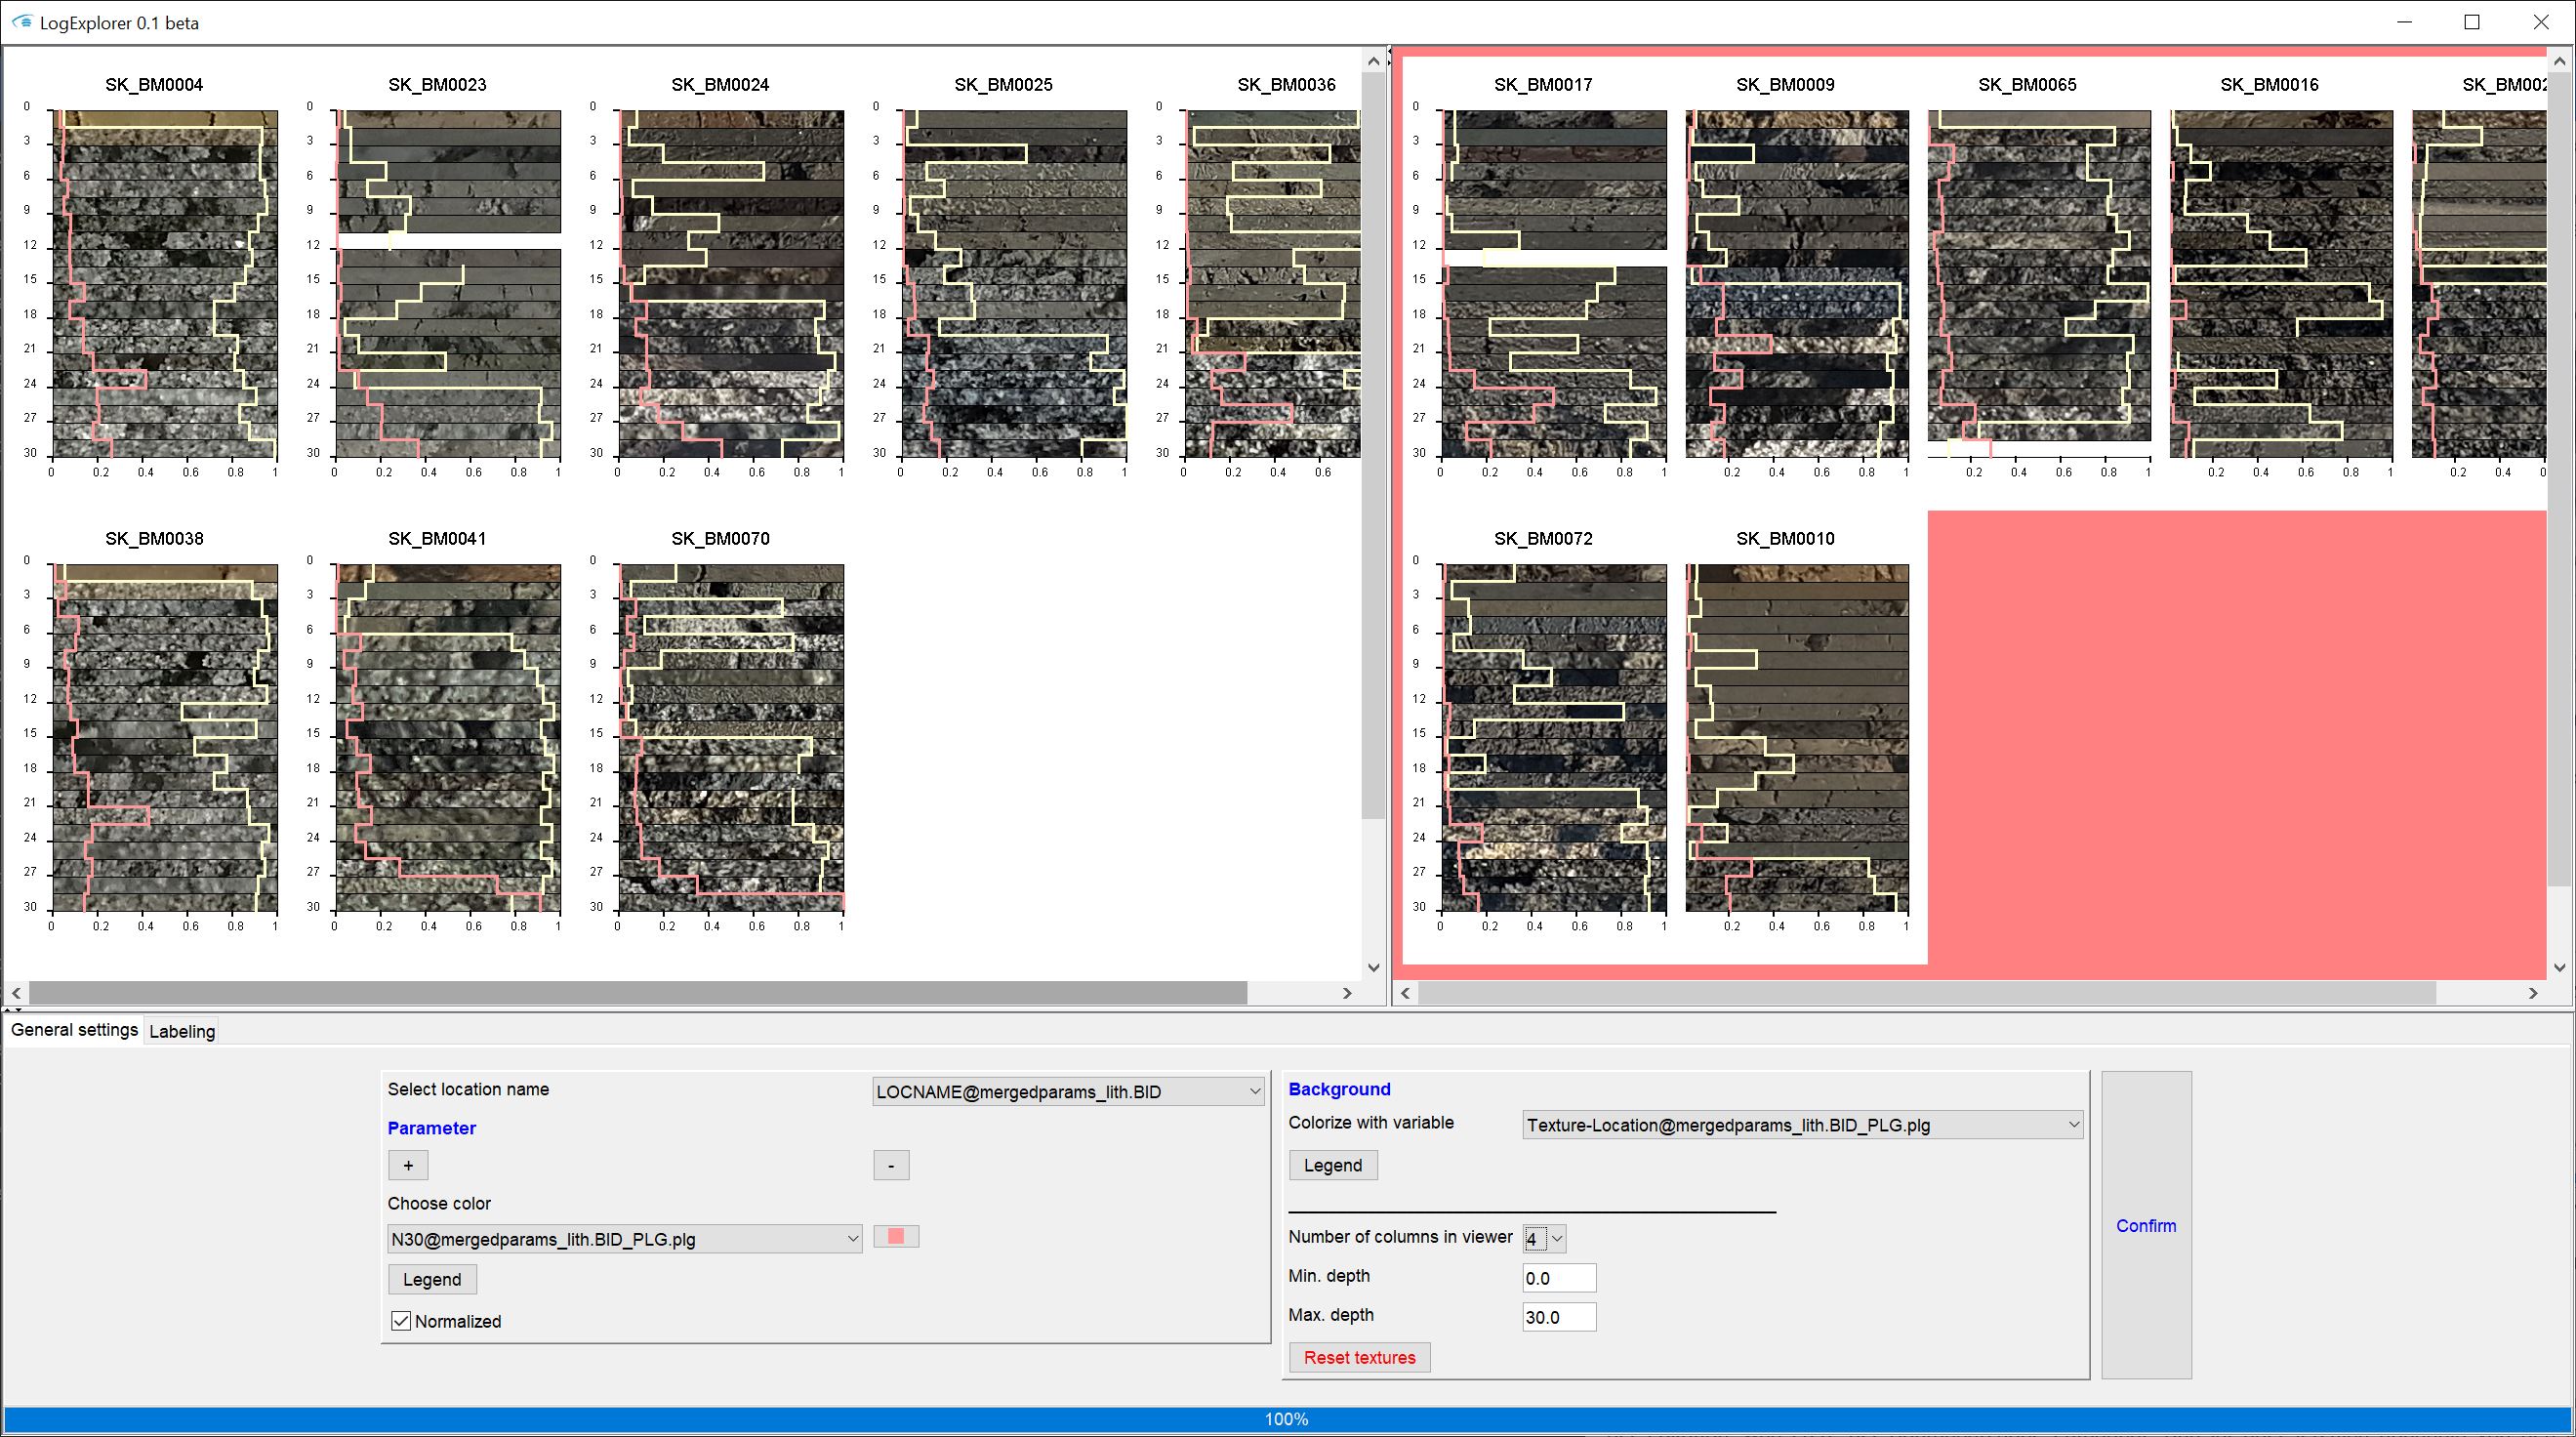
**The core texture tables are usually used in the Parameter Managers. To use these options in SubsurfaceViewer, you should be familiar with the basic features of the Parameter Manager. The visualisation takes place with the LogExplorer.
You can find this tool via the Mainmenu -> Tools -> Advanced Tools-> For parameter -> Core Texture Tables.

The application is intended to cut the interesting part of core photographs and to save them georeferenced in a table, that the images can be used in the evaluation of the boreholes via the LogExplorer.
To do this, open the path under which all images are to be searched for and listed via Open (superior) image folder in the lower options field. Subfolders are also searched. At Which formats shall be searched for? select the respective file extensions that the searched files should have.
In the middle of the options field the file path of the image you have loaded is shown. The question above asks you if you can read the georeference or the borehole name from the file name.
The first loaded image above and a blue rectangle, which will define the section are shown. With a held mouse click on one of the four corners you can adjust the size of the rectangle by dragging. If Set polygon size is active in the options bar, fix the current rectangle size that it can no longer be changed. For example, you could guarantee the same crop size for each core photo. If you click in the blue rectangle and drag while holding the mouse, you move the position of the section.
In the input bar below the photo you can enter the borehole name under Log, the relative depth in metres (depth) of the upper edge under Top and the relative depth in metres of the lower edge of the displayed core section under Base. For Log enter the borehole name for which you have a master file (e.g. *.bid).
When you have finished entering and cutting, press Confirm on the right. The system checks the input in your fields. The button is displayed in blue so you can see that this image has been saved with the information from the text fields.
To go to the next picture or to the picture before, you can use the two buttons </> to the left and right of the picture. If you have marked a picture with Ignore, it will not be displayed in the sequence of pictures.
Below the leftmost image you will see the button Choose image. This opens a dialogue with the loaded image list with the complete paths with which you can go directly to a specific image.
Save the table with the information. This has the extension *.itxdat and is a TAB-separated ASCII table with 4 columns.
In the first column the borehole name or the location key is stored. In the second column "Depth_top", i.e. the relative depth in metres (depth) of the upper edge of the core section. The third column is "Depth_base", i.e. the relative depth in metres (depth) of the lower edge of the core section. In the last column you will find the title "Texture-Location". You see a text in Dictionary format, i.e. in curly brackets, each with a key value and a target value. The key value is the path of the image, followed by a colon and behind it the image coordinates of the lower left as well as the upper right rectangle corners as text in array format.
If you want to see the core photographs in the LogExplorer, be sure to keep the title and format of the Texture-Location column. If you are working in a team, or have restructured your project folders, you should adjust the paths in the table accordingly using a text editing program.
You can reload the table to restore an editing status. You can also use this if you have accidentally set an image to Ignore. Reload your image folder and the internal table is reset. Load the saved table of your last editing status. All images that are listed and can be found in the table will receive the information from the table. If you skip to these pictures, you will find the Confirm button in blue. Pictures for which no information could be associated, still have a black Confirm button.
The tables are always continued if you have loaded them, i.e. old entries are not overwritten.
Instructions for displaying the core photographs in LogExplorer:
- Load the table with a master file (e.g. *.bid) into the Parameter Manager.
- Add numerical borehole data.
- Create (a) table link(s) and the data tree.
- Open LogExplorer, select one or more numerical parameter(s) to curve plot and select Texture-Location in the Background section for the background.
- Confirm. -> The paths of the images are immediately checked, the images are loaded and cropped to the found cropping coordinates. The image sections are displayed in the depth intervals saved in the *.itxdat table.
