Note:
The applications described here have been developed within the framework of specific project questions and have not yet undergone a broad test phase, which is why they are partly marked with beta status. Please check your results. It is very helpful for us and other users if you give us feedback if you discover a bug.
Note:
All functions below are only allowed for the regular voxel format. Information on the voxel formats can be found here.
The advanced functions for voxel can be found in the menu Tools -> Advanced Tools -> For voxel data:
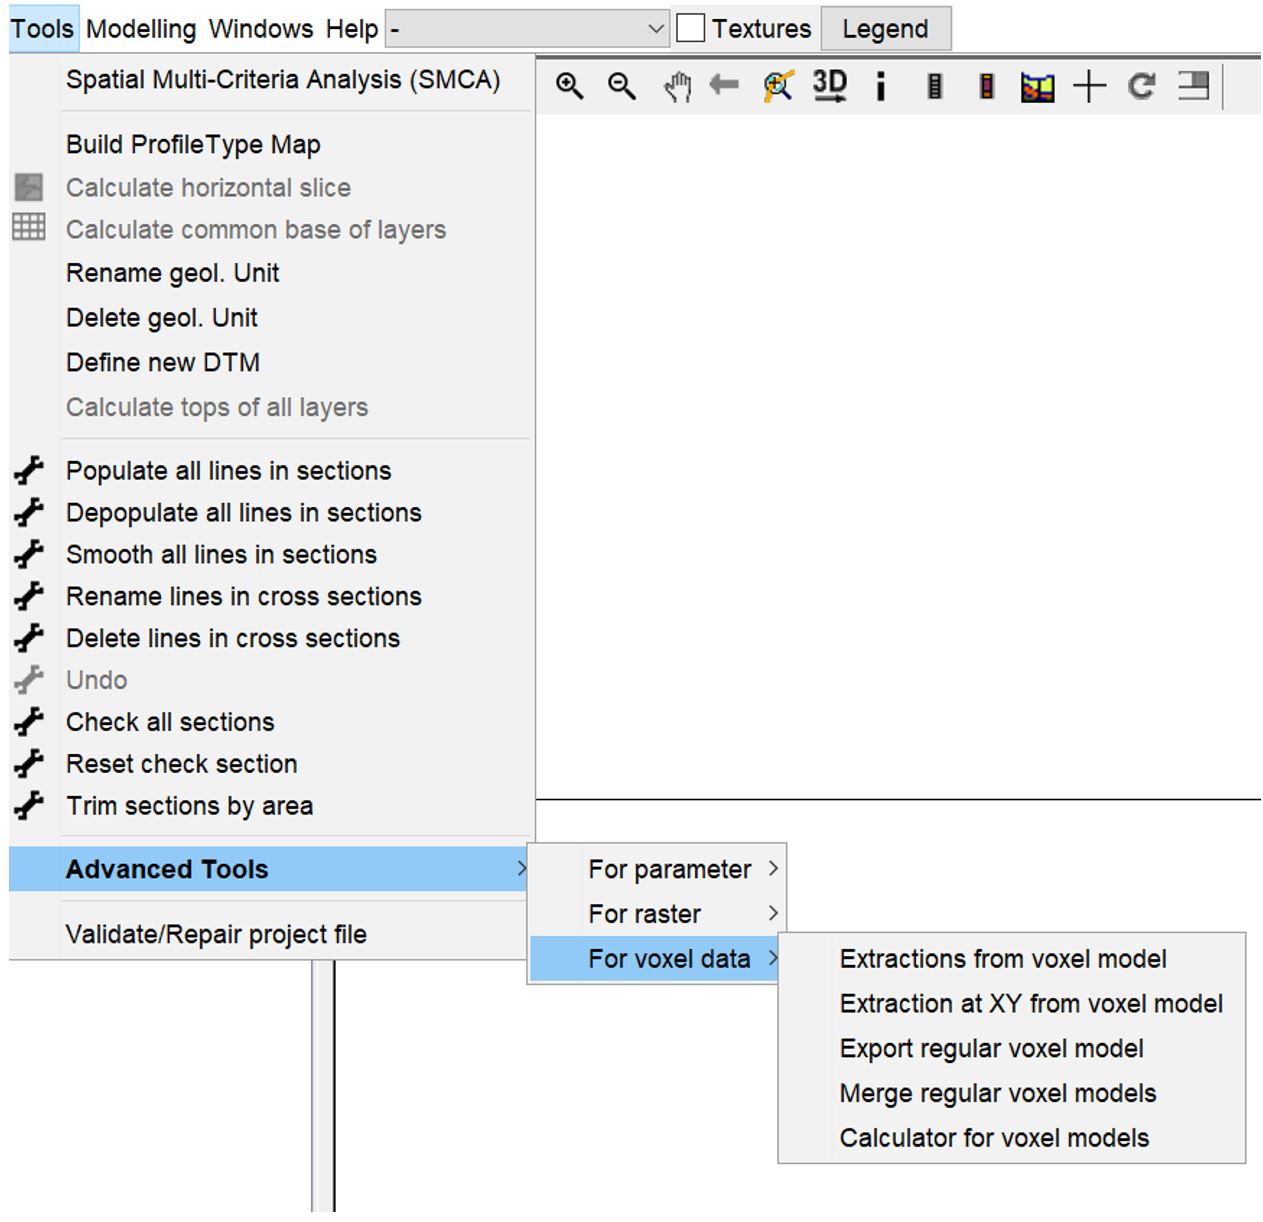
¶ Extractions from voxel model
With this tool you can extract common lower edge (base), upper edge (top), thickness (thickness) as well as individual parameters of descriptive statistics from a voxel model as a 2D raster. This application is especially interesting in combined use with the filter for voxel models. The output raster always have the extent and resolution of the voxel model in its horizontal.
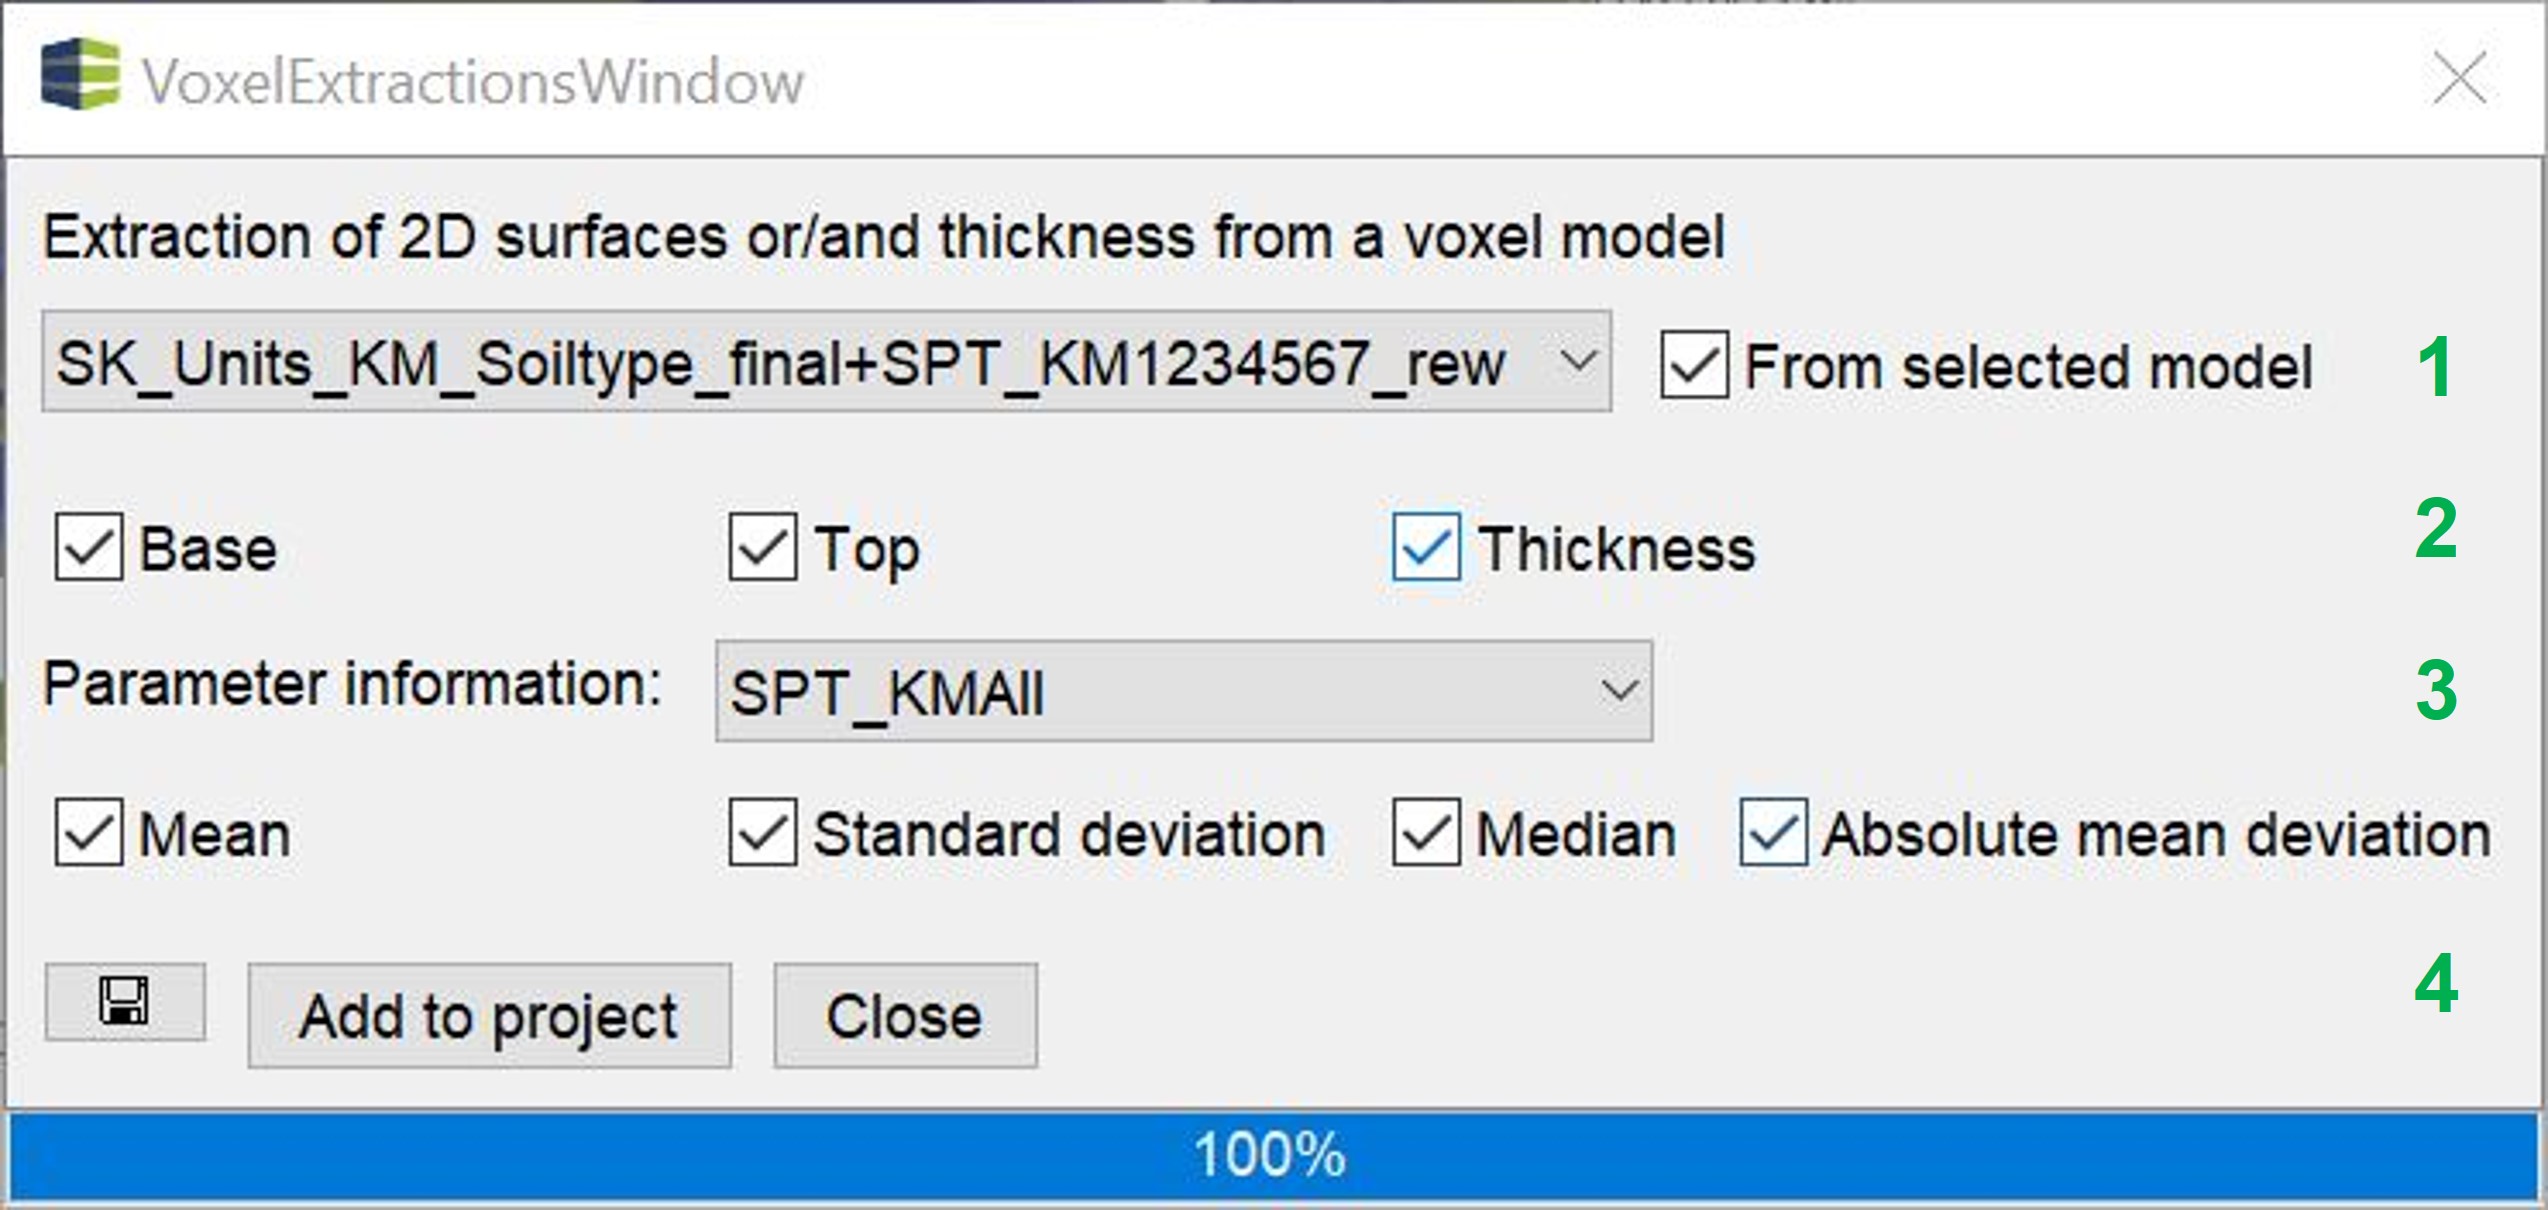
1. In the *Dropdown* list, select the appropriate voxel model to be used for extraction. Keep the checkmark *from selected model* active if you only want to perform the extractions using filtered voxels.
- Set a check mark for the selection of area and thickness raster extraction.
- Here you select the target parameter from the parameter list of the voxel model with which you want to extract the statistical results below. If something is selected, at the XY coordinates of the voxel centres, all (selected) voxels from the vertical are used for the calculation of the results (mean, median, etc.) and written into the cell of the output raster.
- Select add to project to view the results directly in the project. ATTENTION, no files are saved yet. These are temporary results in the memory until the time of your active saving. If you want to save the results, you can either use the button with the save symbol on the left or save the individual results from the project via the right-click context menus at a later time.
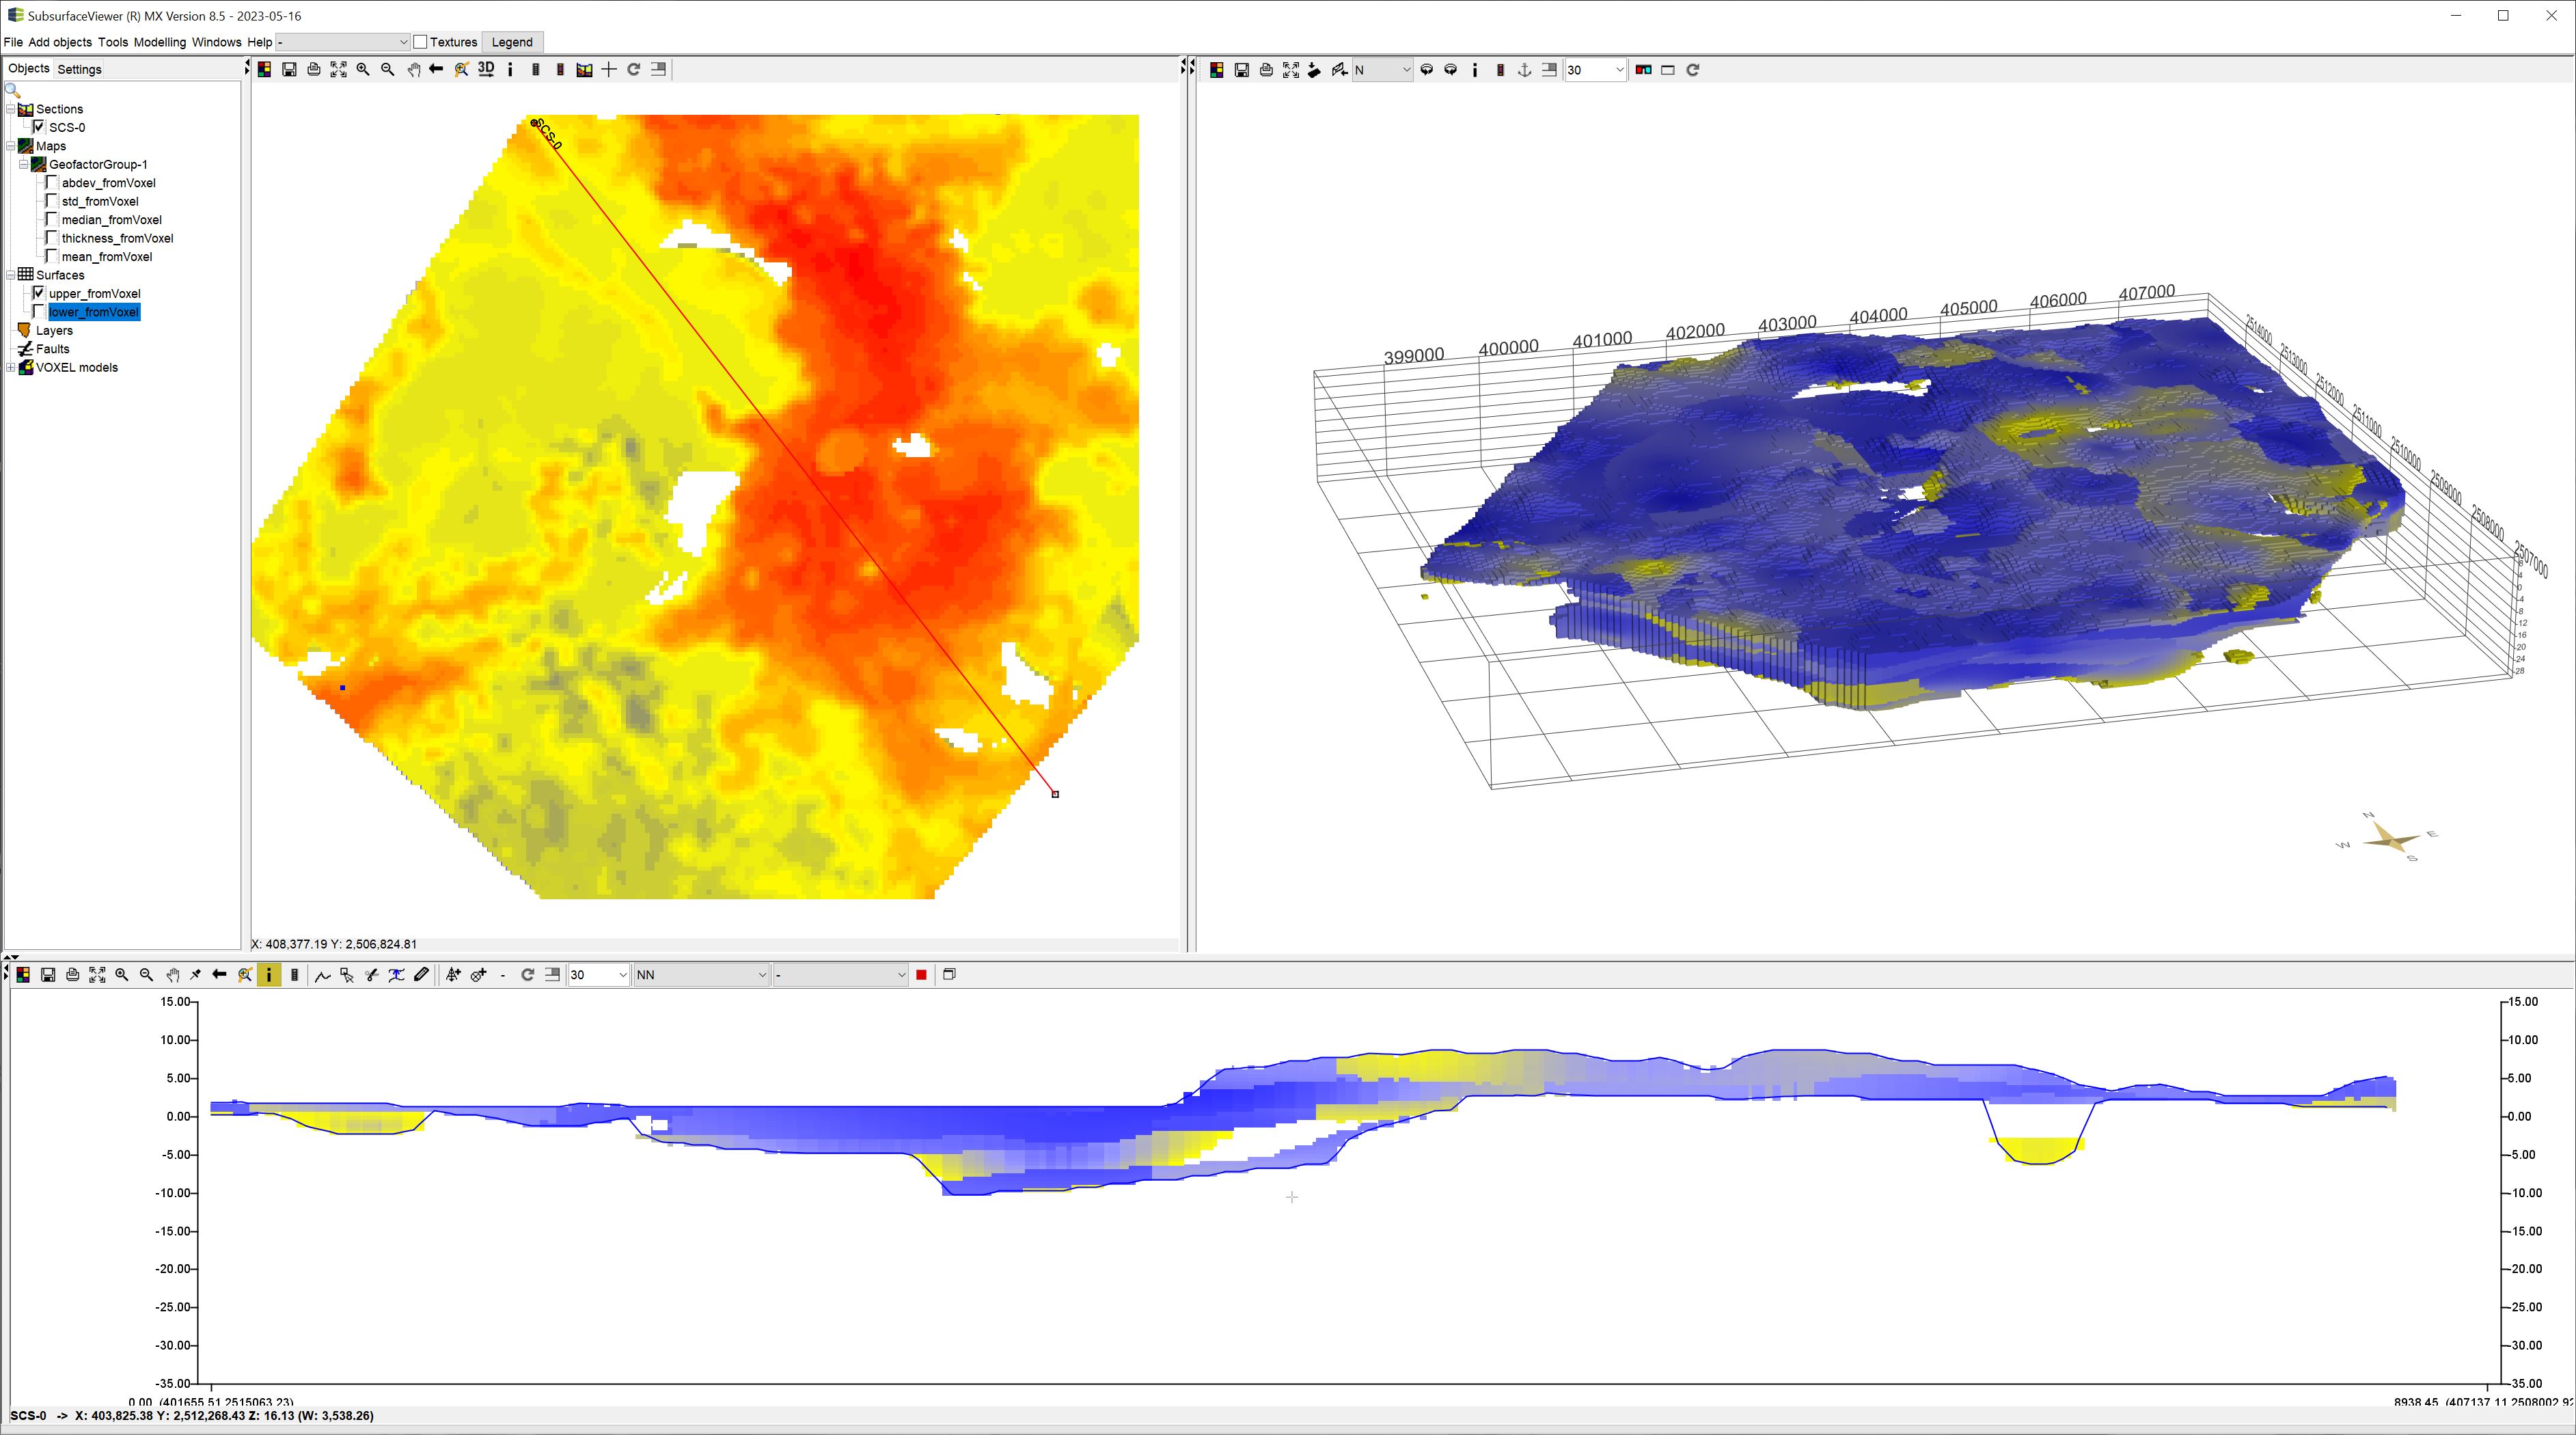
Statistical extraction grids as well as the thickness grid are directly loaded as geofactors when using the add to project option. The top and bottom edges can be found in the surfaces category. In the image below you can see a generated profile section showing a filtered voxel model and the line crossings of the extracted top and bottom edge rasters.
¶ Extraction at XY from voxel model
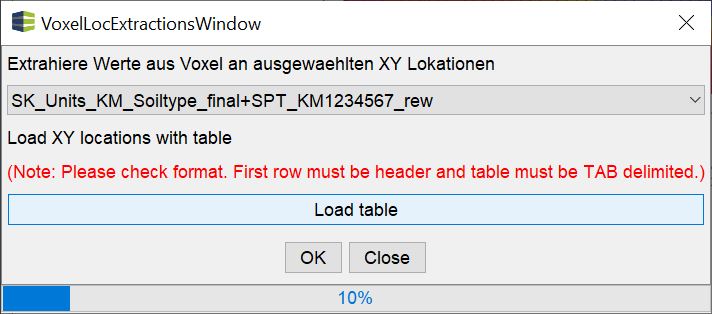
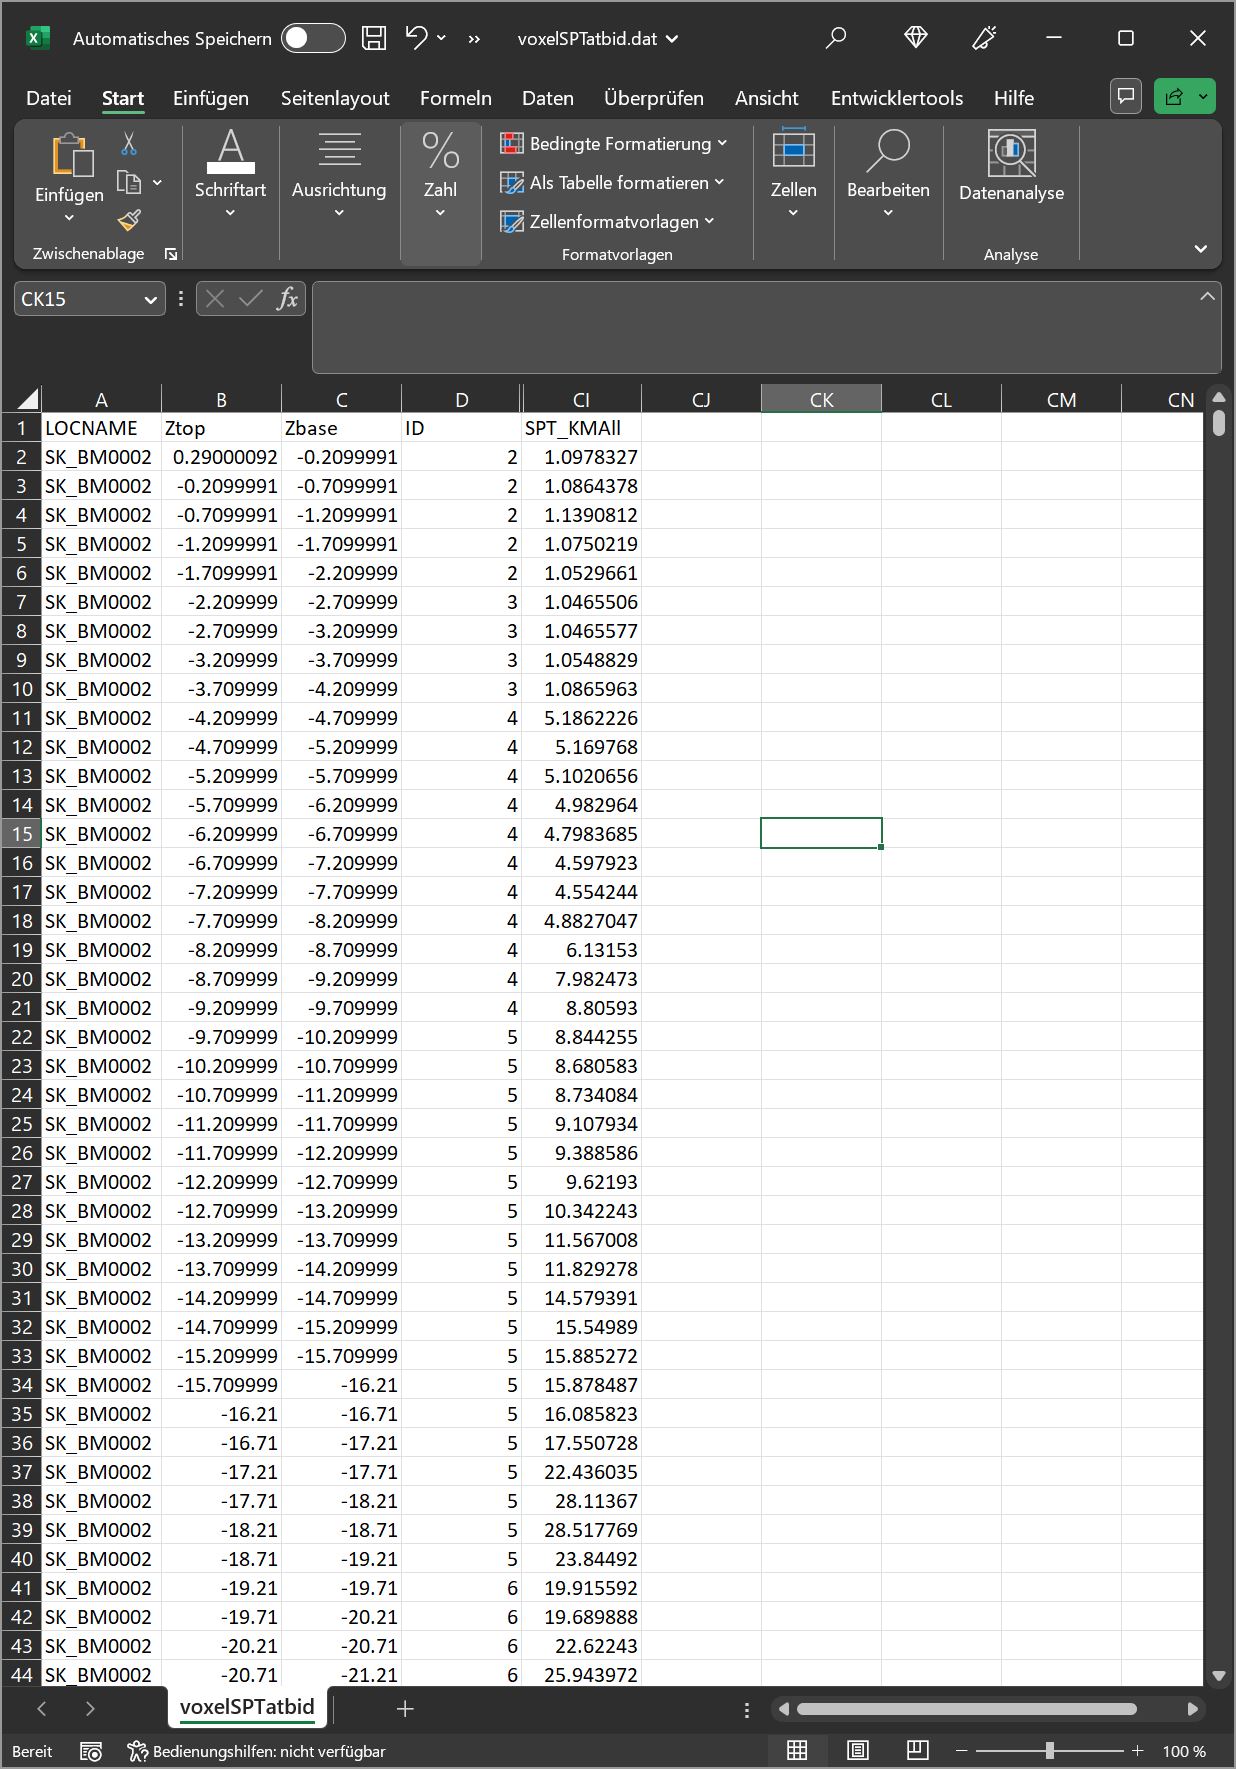
With this very simple tool you can export the values of a voxel model specified XY locations by reading in an XYZ file or a *.bid file. The output is a simple table. If it was created with a *.bid table, it contains a column with the location name, one for the absolute height (usually m NN) of the top edge (Ztop) of the voxel, a column for the bottom edge (Zbase) of the voxel and then the columns with the parameter values located in the voxel model. Rows whose parameters are completely filled with NoData values are not output in the result. If an XYZ file was used for extraction, you will find, instead of the location name, a column X and a column Y for the coordinate assignment. The other columns result as with a *.bid file.
¶ Export regular voxel model
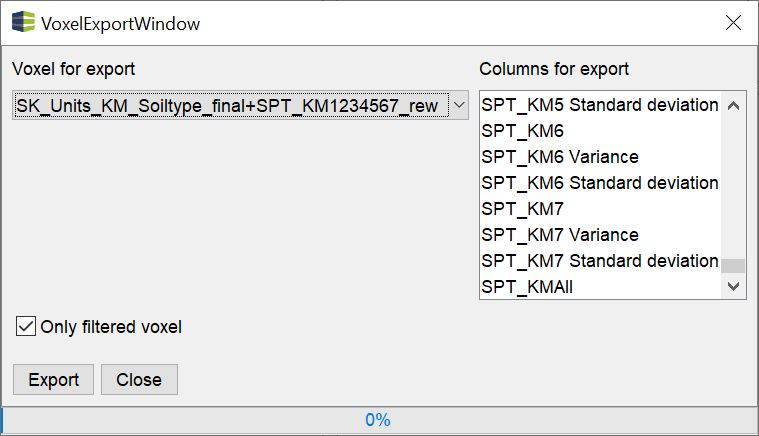
With this simple tool you can selectively save a new voxel model. Use the dropdown list at the top to select the voxel model loaded in the project that you want to selectively export. With the list on the right you can select those parameters that should be written with the export. If you do not select anything here, all parameters will be written to the export.
If you keep the checkmark only filtered voxel active, a NoData value will be written to voxel positions that were not selected by the filter. The dimension and resolution of the exported voxel model always corresponds to the input voxel.
¶ Merge regular voxel models
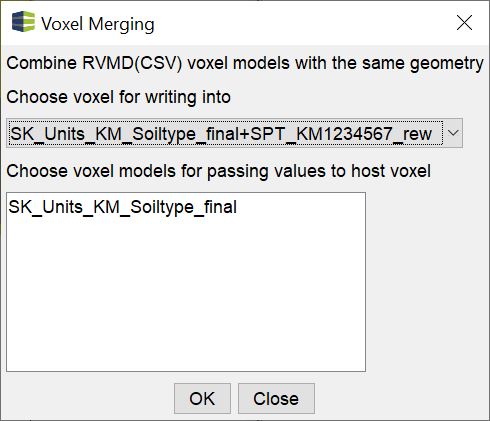
With this simple tool you can merge regular voxels with the same dimension and resolution. This can be especially helpful if you want to calculate kriging models with different parameters or options in parallel and merge the results into one voxel model.
Select the voxel model you want to transfer data to in the upper dropdown list. You will see selectively in the list below those voxel models in the project that have the same dimension. As soon as you press OK you will be asked to define a storage location and the merge will be performed.
¶ Calculator for voxel models
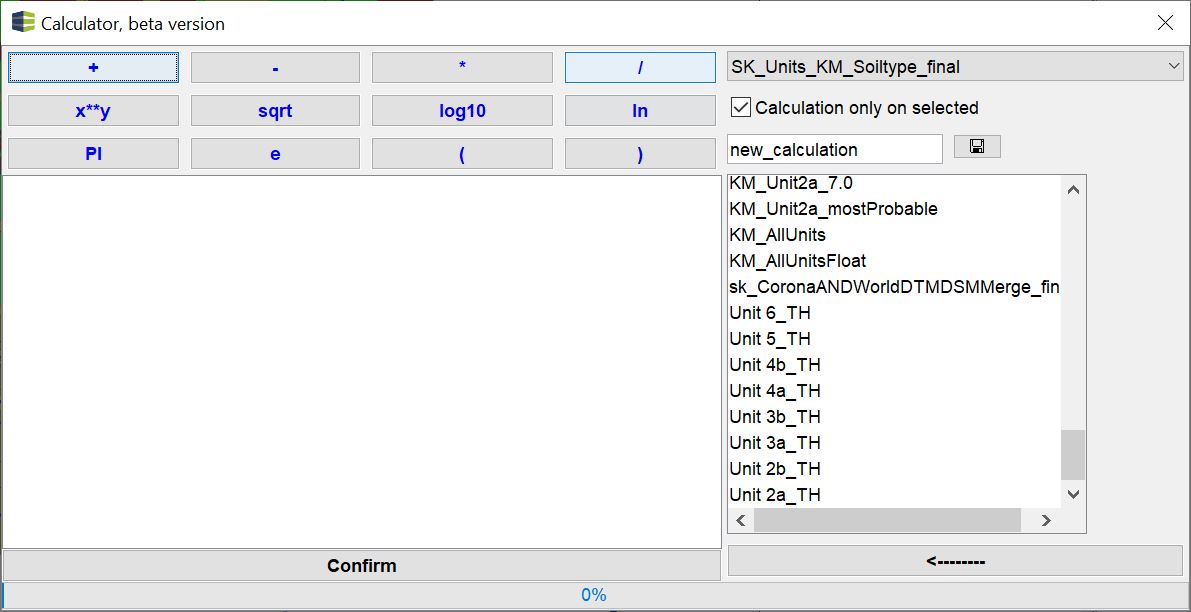
The calculator for voxel models is basically set up in the same way as [the calculator for rasters](/en/Funktionen/ErweiterteFunktionenGrids#calculator-for-raster).
Select the voxel model you want to calculate with in the dropdown list at the top. If you want to perform the calculations only on filtered voxels, keep the checkmark calculation only on selected active.
The text input field below determines the name of the new column in the voxel model that contains the result.
It is important that this name is set correctly before the calculation, because the calculation is first saved temporarily in a folder and the name is taken from the text field. This allows to perform different calculations on different voxel selections one after the other and export the results all together under one parameter entry (column). Be aware to never close the window. It will delete the temporary files. If you have calculated something and not saved anything before closing the window, you will receive a *pop-up* window with a warning. If you want to calculate several different results, you should change the name before the new calculation, unless you want to overwrite.
If you have loaded raster data into your project and open the calculator for voxel models, they will appear as names in the list on the right. There are not only the parameters stored in the selected voxel model. If you insert the name of a raster into the formula and press confirm, the corresponding value of the selected raster will be set at each XY position of a voxel. This way you can transfer your 2D data into the 3D voxel format. This is usefull, if you have performed layer- or depth-based 2D kriging over a specific parameter. You can create a voxel model which you select by layers or depth planes and assign your 2D result to these selected voxels. An example of such a workflow can be found here.
Remember, that to have enough storage space available in the temporary folder. You can select this folder individually under programme settings.